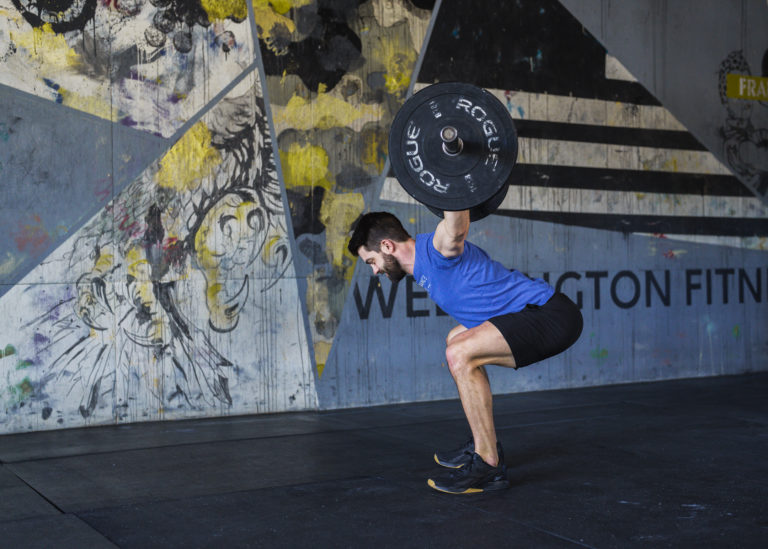
Few movement patterns are as foundational and frequently assessed in CrossFit as the squat. Whether it’s a heavy 1-rep-max or a set of wall-ball shots, we focus on squat depth with the hip crease below the knee. But for many athletes, hitting that depth consistently and pain-free can be a struggle.
More often than not, limited depth isn’t about effort or grit. It’s a mobility issue — typically at the hips or ankles. These two areas work together to allow a smooth, deep squat. When one is restricted, the other compensates — and that’s where poor mechanics and knee pain creep in.
In this article, we’ll explain how hip and ankle mobility impact depth, how to assess your limitations, and what you can do to fix them so you can squat lower, stronger, and with less pain.
The Hip-Ankle-Knee Connection
The squat requires a synchronized effort from three key joints: the hips, knees, and ankles. As you descend:
- Ankles dorsiflex (the shin moves forward over the foot)
- Knees flex
- Hips flex
To hit CrossFit’s “hip crease below the knee” standard, the hips and ankles must move well. While limited knee flexion is rarely the issue, the ankles and hips are frequent culprits when squat mobility is compromised. Fortunately, these two regions can often compensate for one another. For example, strong hip mobility can sometimes offset limited ankle mobility and vice versa. But when both are restricted — or when one is forced to do too much — it’s a recipe for discomfort or injury.
Assessing Ankle and Hip Mobility: Who’s Pulling the Weight?
To explain how ankle and hip mobility work together, I like to use a group project analogy. Picture three teammates: one does their fair share, one underperforms, and the third has to overdeliver to make up the difference. Who ends up the most frustrated? The person is doing extra work.
Now apply that to the squat. If your ankles are stiff, your hips will compensate by working harder to keep you balanced. That might lead to tightness or pain, not because your hips are the problem, but because they’re overworked.
Visual Screening
Start simple: have a coach or training partner film your squat from the side. What do you see?
- Do your knees track forward over your toes?
- Is your torso staying fairly upright?
- Or do your knees stall out early, forcing your chest to drop and hips to take over?
A forward torso lean often points to ankle mobility limitations, though proportions like femur and torso length matter too (we broke that down in a previous article on body proportions and squat technique).

Still, video is just a starting point. Let’s dig deeper and use tests to ensure we work on the right areas.
Ankle Mobility Test
Test: Kneeling Wall Test
- Get barefoot and drop into a lunge.
- Place your big toe about one hand-width from a wall.
- Try to drive your front knee forward to touch the wall without:
- Lifting your heel
- Letting your knee collapse inward or rotate outward
Interpretation:
- If you can touch the wall, ankle mobility is likely sufficient.
- Fall short by an inch or more, and the limited ankle dorsiflexion may affect squat depth and increase knee or hip stress.
Hip Mobility Test
Hip mobility is more complex to evaluate than ankle mobility because of the wide variability in human anatomy. The shape of the hip socket (acetabulum), the angle of the femoral neck, and even the depth of the pelvis can all influence what “normal” looks like for an individual. So instead of hunting for perfect angles, our goal is to identify whether a lack of mobility exists — and more importantly, where that limitation is coming from.
What we’re really trying to assess is the total arc of motion available at the hip joint. This refers to the combined range of internal and external rotation of the femur in the socket. Ideally, we’d love to see an arc of around 85 degrees or more, but even more valuable than the number itself is determining if one direction is significantly more limited than the other. That imbalance can tell us a lot about what’s restricting your squat and where we should focus our mobility efforts.
View this video to test both directions.
Test 1: Hip Internal Rotation (IR)
- Sit on a box or bench so your knees are bent at 90 degrees and your thighs are parallel to the floor.
- Keeping your thigh still, rotate your leg outward so your foot moves away from your body.
- This creates internal rotation at the hip.
What to look for:
- Ideally, you should see 30-35 degrees of rotation.
- Many athletes struggle to hit this, especially those with highly developed glutes and posterior chains.
- Limited IR often feels like a blocked, tight, or even “jammed” sensation in the front or side of the hip.
Why it matters:
Hip internal rotation is crucial for hitting full depth in a squat, especially when the stance is narrower or when the knees track forward. Without it, you’ll either:
- Shift weight to the outside of the foot (putting stress on the knee)
- Compensate with more lumbar flexion (risking low back discomfort)
- Or just get “stuck” partway down
In my physical therapy practice, hip internal rotation is by far the most commonly limited direction in CrossFit athletes, largely because external rotation gets all the love in stretching routines (think pigeon pose).
Test 2: Hip External Rotation (ER)
- From the same seated position, now rotate your leg inward so your foot moves across your body.
- This creates external rotation at the hip.
What to look for:
- A good goal is around 45 degrees of external rotation.
- Most CrossFit athletes perform well here due to frequent exposure to wide-stance squats, deep sumo positions, and common mobility drills that emphasize this direction.
What we’re really assessing:
When you compare both directions, ask yourself:
- Is one significantly more restricted?
- Does one feel tighter, less controlled, or asymmetrical from side to side?
If internal rotation is the clear limiter, that’s your first target for mobility work. And even if your total arc is decent, a major imbalance can still restrict movement quality and lead to compensations down the chain.
Key Takeaway
You don’t need “textbook” mobility in both directions to squat well. But if one direction is noticeably behind, your body will find a way around it, often by loading tissues that aren’t meant to absorb that stress. That’s why identifying your most limited direction and focusing mobility efforts are often the fastest ways to see improvements in squat depth and comfort.
Improving Ankle Mobility
Here’s a quick session you can hit if your ankles need some help from our Ankle Mobility Overhaul program.
Ankle Mobility Workout
1-minute lateral tibial glide per side
Then, 3 rounds of:
– 40-second bent-knee calf stretch
– 8 Russian baby makers
Improving Hip Mobility
If your hip internal rotation is stiff, here’s an example workout from our Hip Mobility Program.
Hip Internal Rotation Focused Workout:
1-minute hip pry with lateral distraction
1-minute internal rotation mobilization with movement
3 rounds:
-8 90/90 IR lifts per side
-12 side hip-ups per side
These can be game changers, especially for athletes who’ve spent years only training external rotation.
Conclusion: Unlock Your Squat Potential
Your squat is only as deep and comfortable as your weakest link. Whether it’s your ankles or hips doing less than their share of the work, the result can be limited depth, poor positioning, and eventually, knee pain.
The good news? You don’t need to overhaul everything — just identify and target your biggest limiter. By restoring the balance between hip and ankle mobility, you’ll squat deeper, lift stronger, and train pain-free.
About the Author
 Zach Long is a Doctor of Physical Therapy at Onward Physical Therapy, the founder of TheBarbellPhysio.com, and co-founder of PerformancePlusProgramming.com. He specializes in mobility, strength, and prehab programming for fitness athletes. He is passionate about helping athletes optimize performance and prevent injury through evidence-based strategies and expert coaching.
Squat Mobility and Knee Pain: What Every CrossFit Athlete Needs to Know