Originally published Oct. 25, 2017, in the CrossFit Journal.
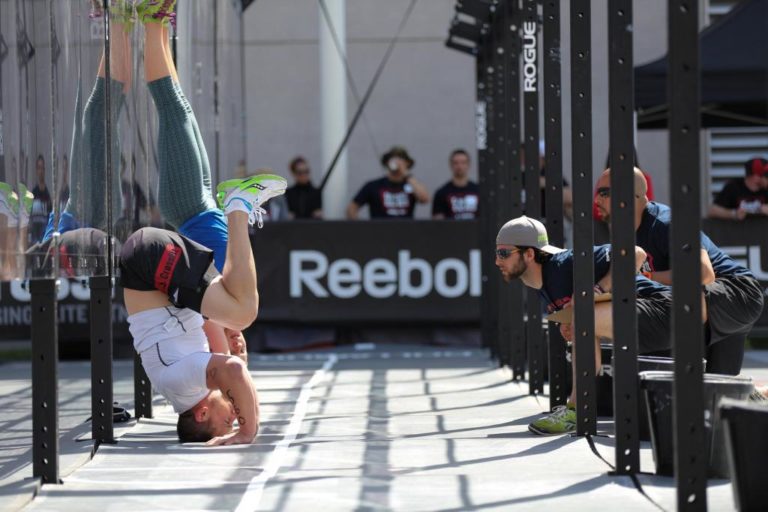
No coach likes to see someone kick up to a wall and then collapse.
Before an athlete attempts a handstand push-up, it is imperative that he or she has crossed off all elements of this progression:
- Triceps push-up
- Bear-crawl (or pike) handstand push-up on floor
- Scaled handstand with feet on box
- Handstand on wall
- Strict press overhead with barbell
- Strict full-range-of-motion ring dips
Why go through this short laundry list? Safety and strength development!
Once you have established that an athlete can safely hold a handstand position, he or she can work through the progression that leads to a strict handstand push-up. As with other movements in this series, we recommend athletes perform the strict movement before they kip. The progression of building strength in the strict form is important for several reasons:
- The athlete will be able to control the descent to the floor and keep the neck and spine safe.
- The athlete will have the strength to create an active bottom position that puts less weight on the head, and his or her spine will say “thank you.”
- The athlete will be able to knock out more kipping handstand push-ups with a foundation of strict strength.
Positioning: The Tripod
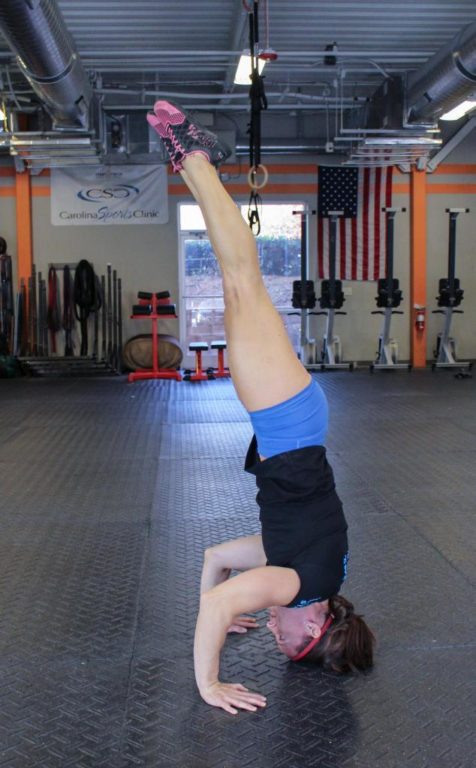
At the top of the handstand push-up, the body will be stacked in the same position we use for a handstand hold. At the bottom of the rep, the head and hands create a triangle, or tripod. Why? Each skill should build upon the other.
“The triangle creates a slightly disadvantageous lever system because the hands are further away from the frontal plane … but this disadvantageous lever builds a great deal of strength,” according to the CrossFit Specialty Course: Gymnastics Training Guide.
We want to eventually perform freestanding handstand push-ups, so this tripod is necessary for balance away from the wall.
Performance
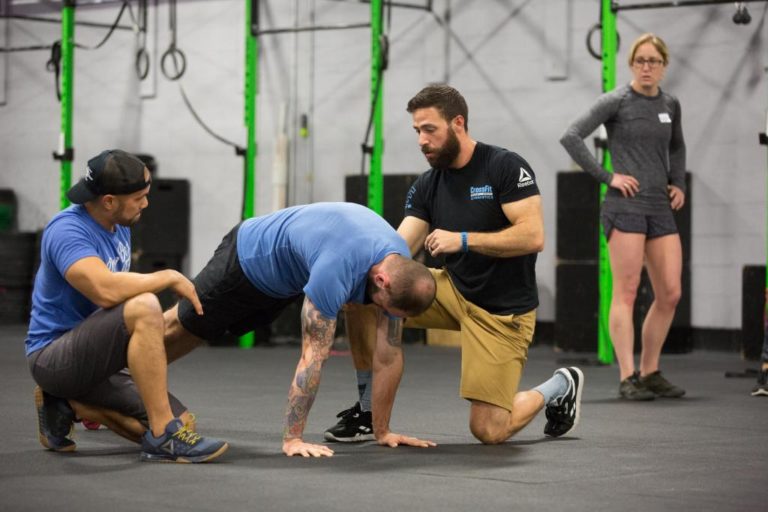
The athlete should kick up to the wall and control the handstand. The hands will be just outside the shoulders, with the fingers slightly turned out. To prevent bowing, the core is engaged, the glutes are squeezed, and the toes are pointed. The athlete will shift the weight toward the fingertips to bring the shoulders slightly ahead of the fingers. The head remains neutral during the descent to touch the top of the head — not the forehead — to the floor. The elbows track back during the descent as the triceps carry most of the load.
To keep the neck and spine safe, the descent should be controlled, so the top of the head only taps the floor and the athlete pushes back up without resting. This is not to say headstands aren’t an important part of gymnastics and the handstand push-up progression; they are. But we want athletes to have enough strength to control the descent so they don’t lower too quickly, jar the neck and head, and rest at the bottom before they recover the strength to push up.
To push back to the start position, the athlete drives through the heel of the palm — a strong base.
Video: Strict HSPU
Scaling Options
1. Strict push-ups — Ensure the hips and shoulders rise at the same rate and the core is very tight. The hands should be placed just outside the shoulders, and the elbows should go back toward the hips at the bottom rather than away from the body.
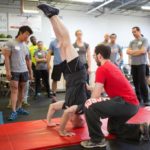
2. Bear-crawl handstand push-ups, aka pike handstand push-ups — Use a wide stance with the heels off the ground, and make sure to lean toward the fingertips to create a tripod position. The head should contact the ground in front of the hands.
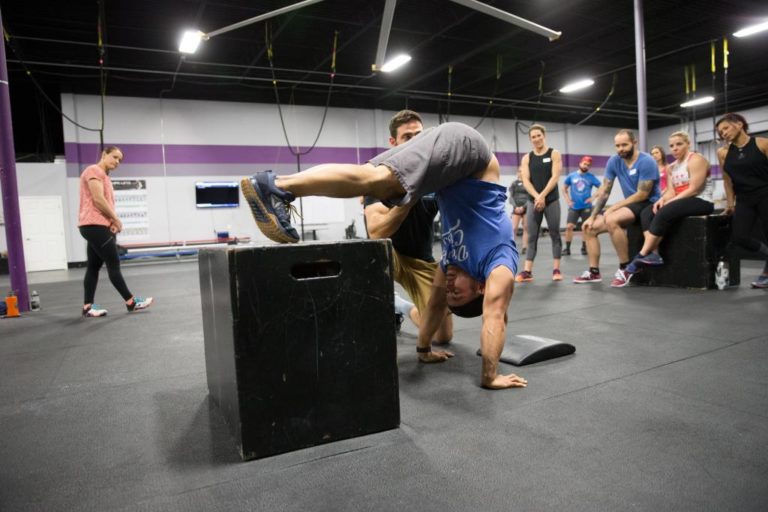
3. Box handstand push-ups — From the CrossFit Specialty Course: Gymnastics Training Guide: “The box drill is a great scaling option because it effectively decreases the load of the movement while maintaining full range of motion. The athlete places the toes on the center of a box and pikes the hips to create an inverted position. The same rules of the HSPU apply: The athlete lowers to create a triangle and then presses back up, making sure to open the shoulder completely at the top of the movement.”
Video: HSPU Progressions
When is it time to move up in the scaling progression? Here are a few questions:
1. Can the athlete perform unassisted sets of 10-15 reps in the scaled movement he or she is working on?
2. Is the athlete creating the correct tripod position at the bottom and finishing with an open shoulder at the top?
3. Can the athlete control at least 5-10 reps on a three-count descent?
This is not an exhaustive list, and movement through the progression will be unique to the individual. But the questions above will help coaches and athletes understand the strength and time it takes to build up to the next step in the progression.
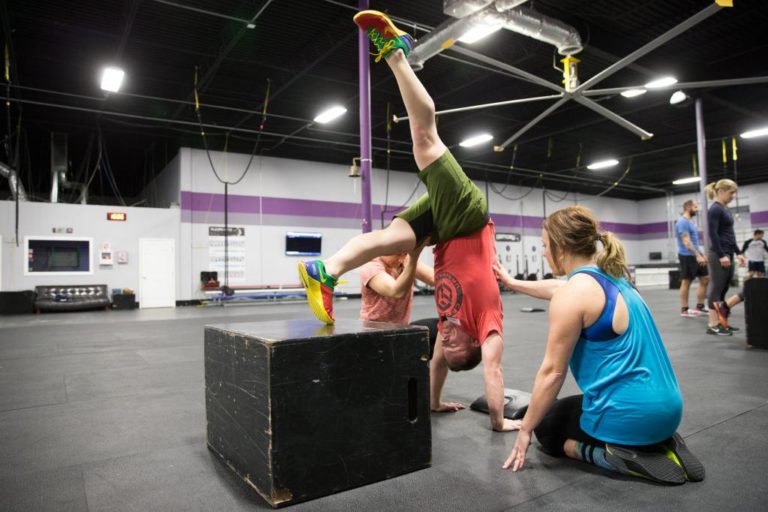
If an athlete is having an issue going from a box handstand push-up to a wall handstand push-up, bridge the gap in two steps: First, raise the height of the box. The higher the box, the more weight the athlete must press back up. Second, the athlete can lift one leg off the box, which will add weight by increasing the length of the lever and stacking more weight over the athlete’s midline.
Video: Box HSPU Scaled
Why not use AbMats to scale against the wall? AbMats shorten the range of motion, and athletes must build proper strength through the full range of motion so they can safely lower the head to the floor. Using AbMats is like telling an athlete who isn’t strong enough to perform a 95-lb. front squat to put 125 lb. on the bar but just squat a quarter of the way.
AbMats do not allow for full range of motion and slow down the process of strengthening the muscles necessary to safely and effectively advance.
Kipping Handstand Push-Ups
When is an athlete ready for kipping handstand push-ups? When he or she shows appropriate strength and mastery of safety in the strict handstand push-up.
What does “mastery” really mean? Can the athlete perform a few consecutive slow, controlled reps without resting at the bottom? Does he or she have awareness of body position? Can the athlete maintain a tight core, create the proper position at the bottom, and start and finish in a stable handstand?
“Mastery of any movement is like art: You know it when you see it. It is exquisite physical demonstration of virtuosity under load. It is beautiful to witness, and to the athlete it is an affirmation of proper training.”
—Jeff Tucker
This is a great way to teach the kip:
1. Have the athlete kick up to a controlled handstand, then lower to an active bottom position in which the hands and head create a triangle. You want the majority of the weight on both hands to protect the neck and spine.
2. The athlete places the butt against the wall while bending the knees into a “tucked” position. If he or she has built appropriate strength in the strict handstand push-up, an aggressive tuck will not be needed. On the descent, the athlete will use the open tuck position — hips at approximately 45 degrees. In Step 3 below, the hips can flex further to 90 degrees, but this deeper tuck isn’t necessary if you have built strength in the strict handstand push-up.
3. The next part happens quickly: The athlete rolls the pelvis slightly under as he or she draws the knees slightly lower before quickly driving the feet upward to the start position (top of handstand) as the arms push away from the floor. The hip “roll” plays an important part in the kip, and the timing is critical. This timing comes with practice. After the athlete rolls the pelvis under, he or she should immediately drive the feet toward the ceiling while “pressing” the hands through the floor. The properly timed press allows us to take advantage of the momentum generated by the hips.
Remember: The descent to the floor must be controlled. It’s imperative to avoid “bouncing” off the head and neck to generate power. If you watch CrossFit Games athletes as they perform handstand push-ups, it’s obvious that they barely put any weight on their heads. They have built the strength and body awareness to control the kipping movement.
Video: Kipping HSPU
As athletes build more strength, they will rely less on an aggressive kip and instead employ a small tuck of the knees and “pop” of the hips.
Patience!
Whether you are building strength in the strict form or learning a kipping handstand push-up after acquiring the appropriate strength, remember that gymnastics is a process. Think of building mechanics, consistency, and then intensity as we are taught in CrossFit methodology, and be patient. Gymnastics is a long game in which patience is rewarded.
Part 1: Stand Before You Walk: Gymnastics Foundations
Part 2: The Position for Your Gymnastics Mission
Part 3: The Secret to Pull-Ups
Part 4: The Keys to the Kip
Part 5: Master the Strict Muscle-Up
Part 6: Master the Kipping Muscle-Up
Part 7: How Long Can You Handstand It?
Cover image: Ross Forte