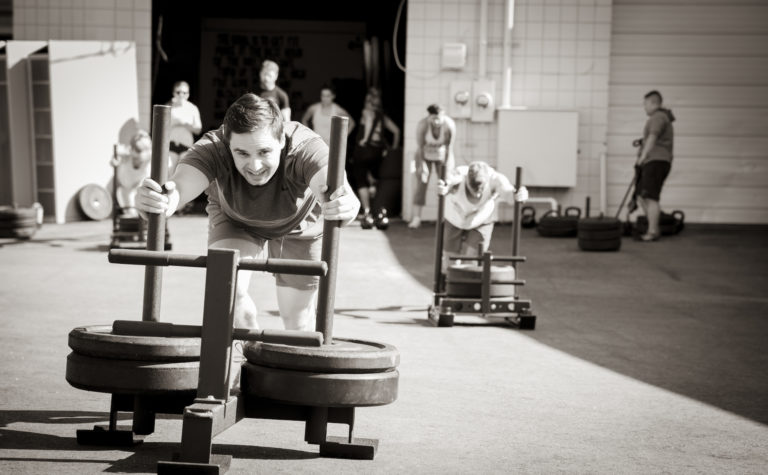
Walk into any CrossFit gym, and you’ll likely find some kind of sled. It might be stored out back with the big tires and Atlas stones. Some facilities have their sleds all set up and ready to use on a strip of turf, and some stow them in a corner with the sandbags waiting for people to haul them out. Sleds are one of my favorite tools and have been a part of CrossFit training for years.
There are two basic types of sleds commonly used in strength and conditioning programs:
- Speed sleds – Often used for sprint training and lighter GPP work
- Dog or prowler-type sleds – Often used for heavier pushes and pulls and in devastating conditioning workouts
While a sled is by no means the first piece of equipment to get for your gym or garage, once you have one, you’ll never want to be without it. Sleds can supercharge rehab, conditioning, and speed training, no matter your level of fitness.
Rehabilitation
Sled pushes and pulls are great early in the rehab process if you’re recovering from a knee, ankle, or hip injury, or any kind of lower-body muscle strain. Sleds are also great for addressing chronic knee pain. Sled training allows you to reintroduce a strength-building stimulus to the injured area, in a movement pattern that mimics walking or running, with total control over the speed, range of motion, and loading used.
For hamstring, quad, or hip flexor pulls, simply walking forward or backward for 10 minutes to an hour while towing an empty or lightly loaded speed sled (attached to the waist with a belt) can help your injured area heal and help you regain strength and capacity quickly. Walking backward is also a gentle and effective method for treating chronic knee pain. As you recover from a joint or muscle injury, a speed or dog sled can be loaded progressively to reintroduce pain-free strength training.
Heavy-Ass Sled Drags (HASDs), popularized by strength coach Joe DeFranco, strengthen the glutes, hamstrings, quads, and calves, as well as tendons and ligaments, while also challenging and training midline stability. Heavy dog-sled pushes provide a very similar stimulus, allowing you to progress from pushing in a high-handle position (with better leverage and less range of motion required around the hip and knee) to a low-handle position. As you progress to a lower and lower hand position on the sled, the push becomes more challenging and requires a greater range of motion around the knee and hip.
Any time you pull or push a sled, you get a good dose of conditioning that contributes to your return from injury at a fitness level as good as, or even better, than before the injury. Sled work for rehab purposes can be programmed daily over varying distances, with a variety of loads, using pushing or pulling, and with any type of sled. This is truly CrossFit-type rehab.
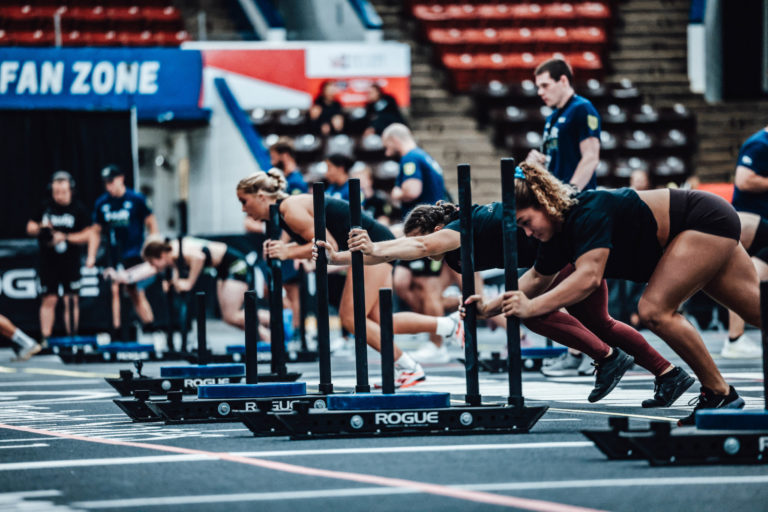
Conditioning
Sleds are a fantastic conditioning tool. They require almost no technical instruction, which allows for their use by almost anyone. Additionally, sleds require constant effort; otherwise, you’ll stop moving. Finding the sweet spot in loading where the sled is hard to move but not glued to the ground results in a tremendous stimulus. Everything from 5- to 10-second sprint repeats, partner relays, or long pushes with short rests, all with varying degrees of loading, is fair game with sled conditioning. Not very many activities can mimic the fatigue and breathlessness caused by pushing or pulling a sled all out for intervals or distance. There’s a reason the term “prowler flu” was invented. Be mindful of this, and ramp up sled conditioning slowly and sensibly.
Speed
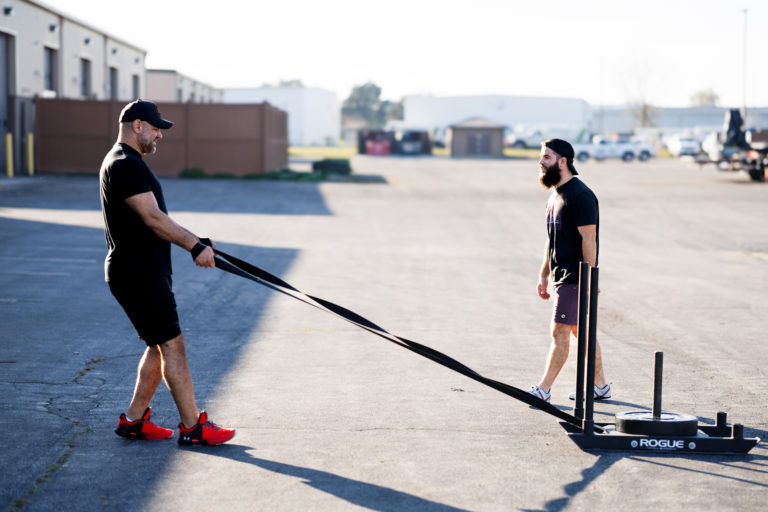
Sled training is excellent for developing sprint speed and integrates well into speed-training programs. Speed sleds with a light load can be used for contrast training, where a sprint is performed towing the sled and then, shortly afterward, a sprint is performed without the sled. Because of the neuromuscular stimulus received from the sled sprint, you are often able to sprint faster than before after a sled sprint.
It’s important to note that the weight on the sled should not disrupt sprint technique or slow you down too much, so err on the side of lighter to start. While towing a speed sled has the advantage of allowing you to use your arms, pushing speed sleds or dog-type sleds also develops the powerful leg drive required to improve acceleration. Different from conditioning methods, speed training pushes or pulls should be short-burst, all-out efforts with full recovery in between.
Sample Workouts
Rehab
Upright Sled Walk — for strengthening or rehabbing the posterior chain.
Workout 1: One long, continuous walk for 10 minutes, done with a natural gait and at a normal walking pace. This is ideal for general physical preparedness (GPP) or early in the rehabilitation process for a hamstring injury. Start with an empty speed sled and progress slowly from there.
Workout 2: Power walking (for strengthening or rehabbing the posterior chain later in rehab). With a long, powerful, aggressive walking stride, pull a speed sled for 5 to 10 sets of 40 yards. With each stride, strike with the heel first, then pull through to tow the sled. The sled should not be loaded so much that it causes your strides to be choppy or unbalanced.
Backward Sled Drag — for rehabbing knee pain.
Walk backward, dragging a sled for 10 minutes. This can be done back and forth inside a gym or on a long straightaway outside. The goal is to accumulate 200 yards of dragging. The sled can be attached with a belt around your waist, or you can pull the sled by holding onto handles attached to the sled with straps. You should take small backward steps, keeping the toes pointed straight forward and pushing through the ball of the foot and rolling to the heel with each stride.
Conditioning
Sled Relay (minimum three athletes): With your gym buddies, set up 15 yards apart — two on one side, one (or more) on the other — sprint the sled 15 yards and hand off to the next person. In one direction, you can push with the high handles, and in the other direction, you can use the low handles. This is great to do for time or reps.
Sled Suicide: Sprints the sled 5 yards and back, 10 yards and back, then 15 yards and back, alternating between high and low handles.
Speed
Dog Sled Pushes: These are all-out 10-yard bursts with lots of rest in between. Eight to 10 sprints are sufficient. You can push the sled on the high or low handles.
Contrast Sprints: These are best performed with speed sleds, as they enable you to tow the sled and utilize your sprinting arm action. The sled should be loaded relatively lightly so you can accelerate. After the sled sprint, wait approximately 30 seconds, then run an unloaded sprint. Six to 8 contrast sets consisting of a loaded 10-yard sprint and an unloaded 10-yard sprint are sufficient. Rest for at least 3 minutes between sets.
These are just a few ideas on how to use this fantastic tool. They can fit into any warm-up, finisher, or workout, or can be used as the focus of an entire workout.
How does your gym use sleds?
About the Author
 Stephane Rochet is a Senior Content Writer for CrossFit. He has worked as a Flowmaster on the CrossFit Seminar Staff and has over 15 years of experience as a collegiate/tactical strength and conditioning coach. He is a Certified CrossFit Trainer (CF-L3) and enjoys training athletes in his garage gym.